Page published 20 January 2021
 Sanding Down: Part Six
2 March 2011
Have you ever suffered deja vu?
No! I don't mean the first photograph, though it is the one I took on Sunday and posted to the blog at the end of the day's work. This time it's here deliberately, to make it easier to judge the day's progress. But I'm ahead of myself.
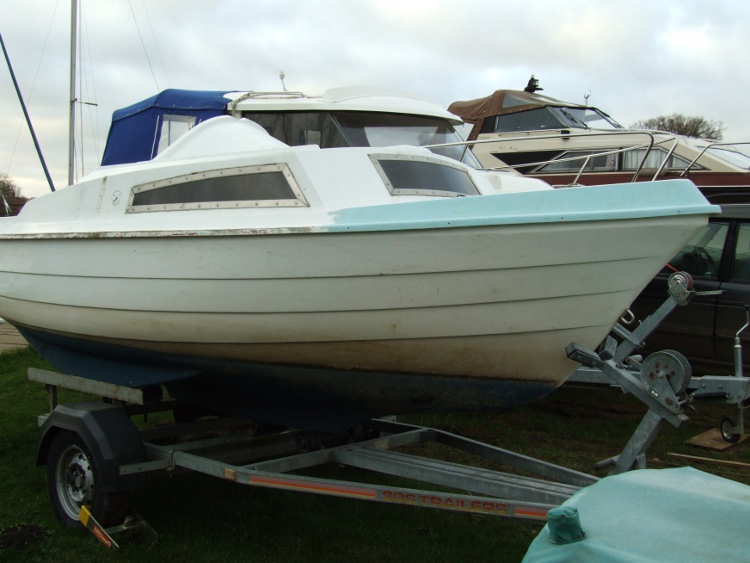
Sanding continues on Imagination?
Work on the boat started this morning by taking my sander apart. Deja vu?
I found a disconnected wire on the switch inside the casing. Deja vu?
I took it down to the boat and five minutes later it packed up! Deja vu"? Perhaps so!
This time the sander just cut out. I know I have said that before, but somehow this was different. It did start again, but only once, when it ground on briefly but after I released the switch would not restart. So it was back to "The Brute".
As before the first few minutes started well, but then the weight of the 600w sander got to me. And that was starting with an easy bit, standing up and doing the bit right under the gunwale at the bows. This time, you see, I had decided to start at the top and work down. As I worked down I seemed to get slower and slower, and I needed to take ever more frequent breaks to rest my arms. (This is beginning to sound like deja vu as well, isn't it!)
The first section went much as expected. As on the port side, I left the small area near the winch bracket to be tackled later. At some point I will have to get inside the boat and unbolt the mooring point on the bows and I figure I'll finish off that area then. I was a little slower on the next three foot wide zone which brought me level with the front of the cabin.
Then I seemed to fall into the way I should be using the sander. It was shortly after I had changed the pad. I guess it was Ian's dire warning about how I'd rip the boat apart if I allowed "The Brute" full reign. However, experience is showing that while powerful, it is no more viscous than my own half sheet sander. It was a combination of being prepared to use higher revs and putting all the pressure on one side of the sanding disk that seemed to make the difference.
I'd been reluctant to do that earlier because I was so concerned to press hard with the full pad in contact with the surface to avoid prevent the disk from spinning. But it doesn't seem to work like that. The disk always seems prepared to jiggle. It never seems to go into a full spin mode. The sanding head will tend to turn at times, but it is always with an orbital movement, so it doesn't seem possible to create those long circular gouges that I remember from my attempts forty years ago with father's original Black and Decker sanding disk.
By comparison I had romped through the next three feet of hull. My sense of time seems to get a little distorted when I'm working on the boat, but I think I arrived at the boat at about 14:30 and back as far as the front of the cabin had taken me almost two hours. I'd done that next three feet by just after 17:00, and I'd spent some time chatting with my neighbouring boat restorer, discussing his work on a vintage electric powered wooden boat, in that time too

Sanding to starboard continues
However, it was now after 17:00 and I was suddenly aware of how cold it was. Under my overalls, I only had on a t-shirt and now I wasn't being shaken about by the sander I felt cold too. I packed up and came home. I didn't feel quite so bad about feeling cold when I read the car's thermometer, It said just one degree centigrade. That's cold enough for snow, I thought!
I know I often get optimistic about how much more I'm going to get done the next time I'm at the boat, but this time I almost wonder if I won't manage to complete the whole of the starboard side of the hull. There's more than half the length to be done, but the height from gunwale to waterline is much less towards the stern. We'll just have to wait and see!
 Sanding Down: Part Seven
3 March 2011
No more deja vu! I promise! Remember that half sheet sander of mine that kept breaking down? It's now in the bin.
I had one more go at repairing it this morning. Took the thing apart - once more showering me and the kitchen in paint dust - and failed to find the problem. I did find some internal cables that, it seems, I'd half chopped in two in yesterday's "repair". I fixed that by cutting out the damaged cable and rejoining the ends, but it still was dead as a Dodo. I decided I couldn't waste any more time on it and in the bin it went.
That little exercise had cost me some time. I was over an hour later than yesterday in getting to the boat. In optimistic mode, I had said at the end of yesterday's report that next time I'm at the boat, "I almost wonder if I won't manage to complete the whole of the starboard side of the hull." The optimism was justified. Had I been there that hour earlier I would have done it.

Starboard sanding nearly complete
And it's all down to "The Pussycat"! Yes, as I hinted yesterday, my new technique with what I had been calling "The Brute" really did work. I dare say that if I hadn't run out of the coarsest sanding disks that I dared to use, then I might have done it.
The pussycat remains heavy, but if I let it spin at full speed instead of pushing hard and slowing it down then not only does it require a lot less effort, it takes the paint off quicker. It's obvious really, but I had been so intimidated by memories of huge gouges that I produced with my father's rotary sander, and Ian's dire warnings about its power, that I really had not been using it properly up till now.
Once again, today's image shows how I finished the day. I meant to get the rest of the gunwale done back as far as the hull had been sanded, but it was well after five and I suddenly realised that the light was failing fast. So I took the photograph and then decided that it really was time I was home. I'm glad I did. As I drove home the thermometer in the car showed just 1°c.
 Sanding Down: Part Eight
8 March 2011
After an extended weekend break, extended, in part, because of a host of email that I felt I had to respond to, Tuesday was another short day on boat. I arrived quite early in spite of having spent some time packing the tools I needed in a large bag and putting that in the car's boot. After Friday's major wash and vacuum to prepare for the weekend trip to visit my brother, I was determined that I wasn't going to recreate the filthy car I ended up with last week.
Finishing off the remainder of the three "planks" on the side of the hull was easy enough though perhaps slower work than it should have been. The trouble was that having run out of the coarsest disks that I dared use, I had moved on to finer grade ones.
With less than ideal tools I was not looking forward to grovelling under the back of the boat and decided, instead, to do the easy bit and tidy up the gunwale which I had left only half finished last Thursday. That turned out to take longer than I expected, partly because of the finer grade disks, but also because I had no sheet sander with which to work. When I tried the one I had brought I realised it was Ian's sparking sander, the one he had told me to bin. The neatly boxed near new one was still at home.
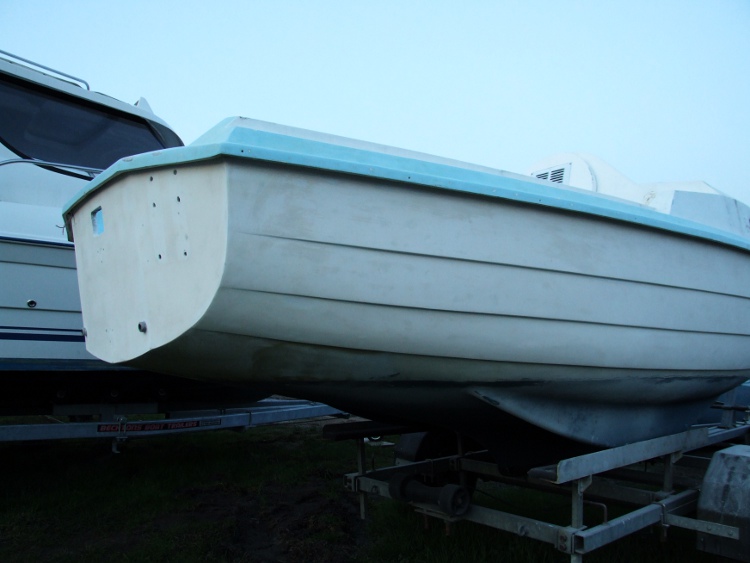
Starboard sanding nearly complete
Even with the "Pussycat", and my new technique, clearing the gunwale of paint took time. I had not realised how much having a long straight edge of abrasive held into the junction of the horizontal and vertical surfaces made for light work of the gunwale. The problem was that the Pussycat just couldn't get into the corner between horizontal and vertical surfaces. I ended up having to do the job by hand with sandpaper wrapped round a block.
In spite of the problem, I managed to get it done and then started work improving the half finished job just inside the stern of the cockpit by the mooring cleats. Again this proved awkward without a straight edged sander. Although, in truth, the reason it was half finished was because the nooks and crannies and different angles had made work in the area with my larger sheet sander impossible. Indeed, this lack of suitable sander caused my first disaster. While trying to clear one area of paint I misjudged how much I was cutting into another surface and managed to cut a groove right through the gel coat!
The really silly thing was that I had the purpose made tool for the job, Ian's Detail Sander. The trouble was that it was at home. So Tuesday had turned into a minor disaster. Two wrong sanders and a whole in the gel coat. Worse, for the writer of a blog, the sun had set and light was going fast. I only got some poor photographs of the work as clouds rolled over us and it began to get chilly. That was enough for me and I was off home!
 Sanding Down: Part Nine
9 March 2011
If Tuesday had been a minor disaster Wednesday was as bad!
After the work on the gunwales yesterday I decided it was time to buy some new sanding disks of the right grade. Off I went to Stalham. The first place didn't have any. They recommended another shop who had to suggest a third as they, too, didn't stock the right size. After failure at the third shop in Stalham, I moved on to North Walsham, to find the same pattern, but there I only tried two shops. Finally, accepting defeat, I headed for Norwich. I have an aversion to the place (and most large towns, come to that!). However, just as Ian had suggested, when he passed me all his gear, I found Screwfix on the ring road and they had just what I needed.
I returned via Tesco at Sprowston, where I went to pick up some fuel. I wondered why there were such huge queues. The answer was they were selling diesel at five to six pence cheaper than any other filling station I have seen in Norfolk! Perhaps I should visit Norwich more often!
As a result of all this travelling I ended up at the boat much later than I had yesterday and immediately set to work under the hull. In spite of the business of having to hold the Pussycat above my head, and probably because I was fresh on site, it seemed to take just a few minutes to reach the central crease line under the hull. Then, joy of joy, I discovered that I had done the port side already. I had completely forgotten that!
I moved on to the remainder of the cockpit gunwales. Starting with the Pussycat and then working with the Detail Sander. It was the first time I had used one and what surprised me was the small amount of movement that there is in the small triangular pad. I wondered if this accounted for the set of even coarser grit "disks" that Ian had bought to go with this device. The Detail Sander didn't seem especially fast, even with coarse grit, but then I decided that the paint seemed especially thick in many of the corners. I put that down to over exuberant spraying, when Imagination was last painted.

Starting on the gunwales
A really annoying thing happened next. A quick buzz-buzz with the Detail Sander and the very small area of paint that I had been trying to get rid of yesterday, when I created the gouge through the gel coat, and the last of the paint was gone. If only I hadn't tried to use an inappropriate tool for the job! I then finished off tidying up both the stern mooring cleat bays and that finished the day.
One good thing about the day was that I remembered to take a photograph in reasonably decent light. A short while later and rain clouds came over and a few rain drops fell. Not enough to make it worth considering packing up, but I did seem to slow my output as at that point I found myself in conversation with the owner of the neighbouring boat in the yard. We both seem to put in appearance on most afternoons. This is good for both companionship and picking his brains about boat repair and maintenance, but it does slow down the job in hand. I can say I would not want his project. It looks to me like the whole of the hull needs re-planking! He's a glutton for punishment, with another substantial grp cruiser that he is working on as well!
 Sanding Down: Part Ten
10 March 2011
This sanding business might be a bore for readers of this blog for me it's just plain dirty!
Thursday looked like being the last day for work this week and, as ever, I arrived on site later than I meant to. This time it was almost 16:30, but as the daylight pulls out in the evening, it's not as bad as it was a month ago.
Today the task was to start inside the cockpit. I donned my usual garb of overalls, gloves, and breathing mask, and performed the ritual of unwinding the cable and plugging in the sander. Then I had to erect the ladder which I had remembered to pack in the car.
Over the last week the ground has been slowly drying out. This meant the ladder rocked on the ground rather than dug into it, so it took a while to find a position where it wouldn't topple. Then it was up into the cockpit. As I climbed aboard I had a sudden thought. Back in Novemebr I had the trailer winch strap re-sown after the end had rotted and I had yet to re-fit it. If I walked to far to the stern the boat was likely to tip and drop off the trailer. Luckily, there were a few short lengths of rope lying around the yard, so I used two of them to secure the boat to the trailer.
I started on the easy bit, the horizontal surface to starboard. It was the first time I could use the weight of Pussycat to do the work for me. I let it run seemingly interminably and slowly ground my way through to the GRP. Progress was slower than I had hoped. Maybe because the paint in some areas is particularly thick, as over the last five years I have added a couple of coats where the original paint had lost adhesion to the undercoat and begun to flake off.

Sanding reaches inside the cockpit on Imagination
By 18:00, as I had begun work with the Detail Sander to finish off in the crevices around the edge of the cockpit, I suddenly realised that the light really was going and grabbed the camera. I then carried on until the whole horizontal surface to starboard was clear, finally leaving off at almost 18:30.
So I have now completed ten sessions. Most of these have been around two hours, with a couple significantly longer. It looks like my original estimate of forty hours to complete the job won't be that far out.
 Sanding Down: Part Eleven
17 March 2011
This title is becoming extremely boring. The only reason I am using it is so in future years I can remind myself exactly how long preparing for the repaint took. By Thursday this week I was feeling extremely guilty. Monday had been a day on the computer. Tuesday was spent visiting Dad. Wednesday was so incredibly foggy and cold looking that I didn't bother to venture out. That's why, by Thursday, I was beginning to wonder if I would make my target of having the boat ready for painting by the end of the month. I felt I had to get down to Imagination.
As it turned out, John, my neighbour at the yard, reported that he had turned out. He got himself chilled to the bone and ended up with one of those moods where one feels that it just isn't worth it. That made me feel completely justified in giving Wednesday the miss.

Sanding reaches the transom on Imagination
One good thing about the guilt was that, however, was that I turned up at the yard at my earliest time ever. I put in a full four hours. In some ways I was a little disappointed with the result. A casual observer might have thought that all I managed to do was complete the top face of the port bench in the cockpit. In fact there was more to it than that. I also managed the whole length of the inside or the cockpit combing right up to the cabin. This includes what I call the cabin wing, the raised part that is faired into the cockpit. Not only that, I also completed the starboard cabin wing, which hadn't even been started when doing the starboard side on Thursday last week. And I managed to whole of the inside of the transom.

Sanding continues in the cockpit
So, in the end, it turned out to be quite a successful day's work.
 Sanding Down: Part Twelve
18 March 2011
On Friday I discovered that Imagination was sinking! At least she would have been, had she been in the water.
I'd been busy tidying up the house ready for the weekend and only planned a brief stint on the boat. I arrived at about 14:30 with the intention of getting one of the vertical panels on the side of the cockpit done. I started using the Detail Sander near the cabin door, but even the tip of the triangular head would not reach fully into the narrow gap between the door and cockpit side. I continued round the rest of the edge of the panel.
Once that was done I opened up the cabin, planning to use the big "Pussycat" sander to get as far into the crevice as I could. The remainder would have to be sanded by hand. It was the first time since October that I had had the cabin open. I went below planning to clear the two bilge fins of water. I had always realised that the gaping holes left in the cockpit after removing the locker mouldings would let in water, but had been relaxed about that as it was easy to see that not much had found its way in.
It was then I realised that I had failed to bring the bucket and sponge with which I had planned to do the baling. The starboard side was practically dry, but the port side needed a fair bit taken out. Not only was the deep part of the bilge fin needing to be dried out but there was also water trapped in the higher part under the bunk, closest to the centre of the boat. The water here seemed to run through a gap in the bulkhead and into the galley area. I tried to swish the water from the upper level down into the main bilge fin. I had a little success, but the level in the galley didn't seem to be dropping at all.
Then it came to me! The water under the galley wasn't coming through from the bunk area, but up from the deepest bilges. I lifted the keel bolt hatch at the forward floor panel and all was revealed. Sure enough the water had reached as high as both these two panels and the bottom edges of the vertical panels to either side of the floor were sitting in an inch of water.
Serious baling was required - and fast! If the ply in those panels show signs of delamination then there is a significant problem as it will be practically impossible to replace the affected panels without a total reconstruction of the whole area forward of the bulkhead. Luckily, my neighbour, John, was able to provide a four pint milk carton with its base removed to act as a baler. What would I do without such folk to rescue me!

The Bilges full of water
Several gallons later I got the water down to the point where I felt I could relax and take a photograph. The bottom of the panels on both sides were slightly stained but I am hopeful that the care I took to put several coats of varnish on both sides and all edges of every panel will have given sufficient protection.
It's difficult to tell how long the wood had been submerged. It was only in the last week that I dropped the nose of the boat to to hook the trailer to the car, so I could work in the cockpit. Hopefully, it has not had too long an exposure and will survive.
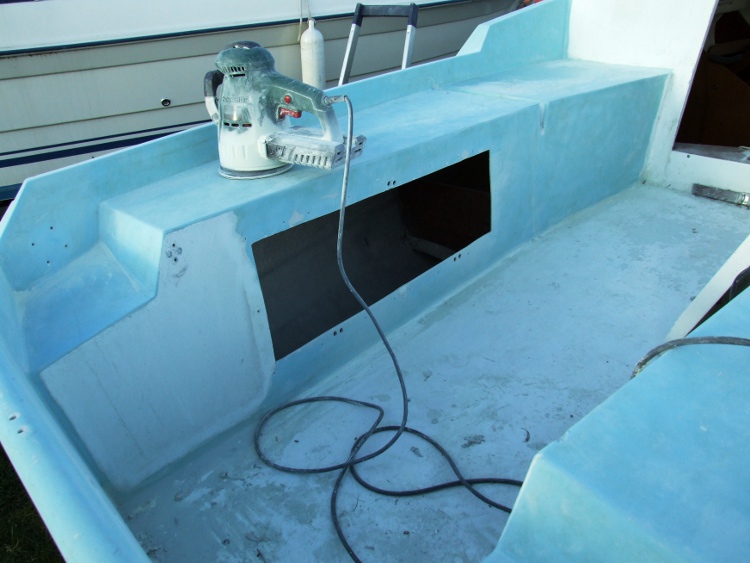
Sanding continues in the cockpit of Imagination
With the water clear of the wood I went back to sanding and managed to clear the majority of the side panel before I decided I ought to take photographs before the light failed. I then completed the sanding of the cockpit side before making a trip home to return with the bucket and sponge I should have brought in the first place to complete the baling of the boat. It will be interesting to see how it all looks after a weekend drying out!
 Sanding Down: Part Thirteen
22 March 2011
I had a bit of a shock when I arrived on Tuesday and found that the bilges once more had water in them. I couldn't remember there having been any rain over the weekend. By the time I'd finished bailing there was some three or four inches in the bottom of the bucket. As there was also no sign of water in the bilge fins I concluded that in connecting up and releasing the tow bar from the trailer, I must have shook things up somehow and some more water that had been there all along had drained into the deepest part of the boat.
Once more I arrived later than intended. This time I was the latest ever, at about 16:00. With the good weather and lighter nights I still hoped to get a couple of hours of sanding in. That was not to be. For a start, as soon as I got to the yard I realised I had forgotten to pack my step ladder. That, at least, was quickly rectified. I was able to borrow another.
That led to getting more involved in a chat with John, my neighbour at the yard, During this, he suggested that I go and have a look in one of the sheds. I was told that Tim, one of the yard's staff was there painting a boat with two-pack, using a brush and roller. So I went. Tim was just about finished for the day and was in chatty mood. He had me roaring with laughter at tales of his youth when he helped his father paint a VW Beetle using Dulux gloss thinned with petrol hanging the various panels around the outhouse at home and what happened when the guy who bought the car came back a while later asking what he had used after he had had trouble getting his touch-up paint to take after his wife had dinged one of the wings.
Of course, the point of the visit to the shed was to confirm my decision to have both hull and superstructure of Imagination painted white using two-pack. Whilst I came away still firmly convinced that two-pack applied with brush and roller was the route to go, when it came to colour I was again returned to a state of uncertainty. There were new arguments to be considered. The main one appeared to be that the trouble with white was glare. I was certainly aware of that issue from my own experience on the water and, these days, it affects me badly.
I ended up re-capping my thoughts on doing a "restoration" on Imagination. This meant returning the boat to ex-factory condition, which meant a blue superstructure, and my alternative of attempting to make Imagination be the boat I always wanted and that was a copy of my father's which was all white.
The trouble, for me, with all white was that I didn't want to see blue through the white as soon as I put a little wear and tear on the boat and it developed the inevitable chips in the paint. I also hoped that this time I would get round to applying the non-slip areas that I missed out on last time and that would overcome at least part of the glare issue.
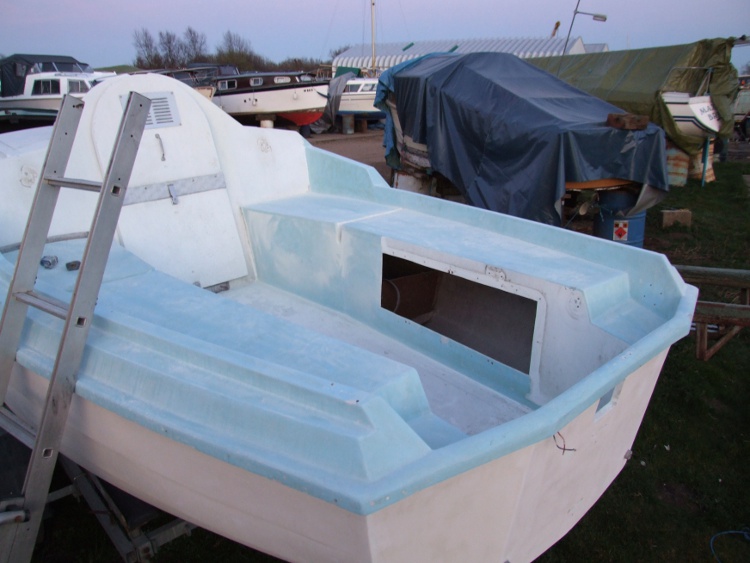
Sanding continues in the cockpit
While there, I also asked Tim to have a look at the progress I was making, to see that I was achieving an adequate finish that would make an acceptable base for the paint. That was a mistake, because it led to further conversation, which largely repeated the earlier one.
The result was that at the end of the day I had not completed sanding the cockpit side. There was still white paint above and astern of the locker hole - a miserable performance!
 Sanding Down: Part Fourteen
23 March 2011
After the miserable performance on Tuesday, Wednesday turned out to be a successful day on the boat. It was another beautifully sunny and warm day and I arrived at around 14:30 and got to work immediately on finishing off the incomplete cockpit side. That was soon done and after a bit of a debate in my mind on whether I should move on to the cockpit sole, I started on the cabin.
Like the deep groves that form the cockpit bench drains, working close round the top of the cabin door was impossible, even with the Detail Sander, because of the hooked shape to the upstand on which the door hangs. I am going to have to tackle that manually with a sanding block, most likely the sponge type. I'm not sure that I'm looking forward to that.
While the upper part of the door was lifted off I checked inside and confirmed that, after yesterday's shock, that no further water had appeared in the bilges.
The rest of the surface either side of the cabin door was straight forward. Then it was up to the ridge that runs right across the boat and over the top of the cabin door. Again that was easy, but I had to swap to the Detail Sander for the tight radius as it changes to the top surface and return to it again for the vertical edge at the front of the ridge. Otherwise the Pussycat did the job speedily enough.
My only problem real problem was that work slowed a little as I was down to my last disk for the Pussycat and I was forced to keep using it for longer than I would have liked.

The start of the sanding the cabin
I moved onto the roof for the final part of the day completing the curved raised surface over the cabin door just before 18:00. The clear sky and good weather meant it stayed light for much longer than it had only last week.
 Sanding Down: Part Fifteen
24 March 2011
Thursday! This is going to be my last day working on the boat this week as I'm having a weekend away and so there's no time to do more tomorrow. What's more they'll be little done next week as I have just arranged to host my sister, Gil, and Gordon, her husband, next week.
It's funny how some jobs become a straight forward grind (Ouch, what a pun!) after a time. This sanding down task has become such a grind. There's little different that can be said, except more progress has been made. The task itself is equally mundane. About the only thing I have noticed is that I seem to be generating more and more fine dust.
I am conscious that whereas once my photographs show clear progress. More recently, the dust tends to be hanging about the boat and it can be more difficult to make one which areas have been sanded down and which still have paint to remove. I haven't worked out whether this is cause by a lack of rain to wash it away, a lack of wind to blow it away, an imperceptibly different sanding technique, thicker paint, different sanding disks - the list of possibilities goes on.
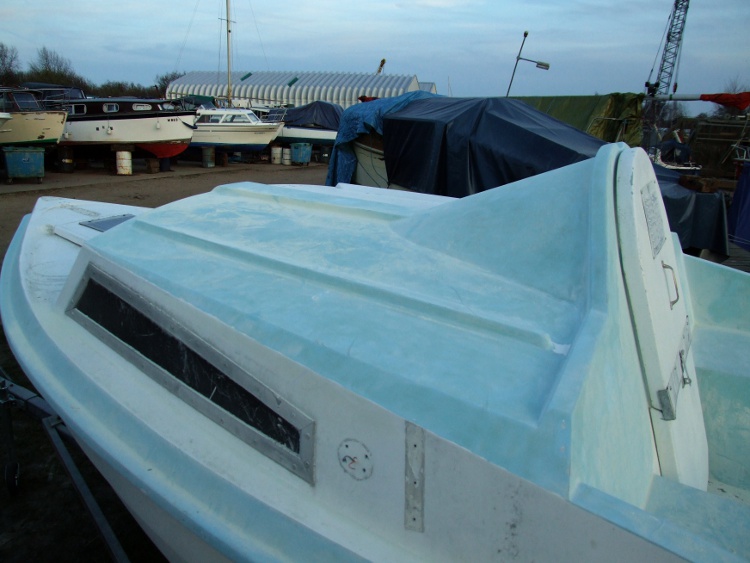
Sanding the Cabin Roof
The straight forwardness means that one's mind can wander while you successfully complete the task. I find myself thinking of what I might be doing over the weekend to come with my new lady. Let's just say I really quite enjoyed today's sanding time and the time slipped by quite quickly.
 Sanding Down: Part Sixteen
29 March 2011
There was no sanding done on Monday and as expected, by getting ready for the arrival of Gil and Gordon on Tuesday took most of the day. It was 16:00 when I got to Imagination, the latest I'd ever been. Donning my overalls and getting out the tools is now a straight forward routine and I had managed to get in an hour's work before they turned up at the boat yard. I handed them the house key telling them I'd be home in about an hour and a half. My plan was that that should have given them more than enough time to unpack the car and give Bonnie, their Springer Spaniel, a walk. I figured I should be home myself in time to relax with them with a cup of tea.

Sanding the Cabin Roof Completed
All went well with the sanding. I completed the starboard side of the cabin roof, which was as much as I had hoped to achieve in the time. I even managed a little of the side deck in the area I usually refer to as the "cabin wings", the perhaps most people would think of as the raised gunwale area near the cabin. It was just after 18:30 when I packed up and went home.
In truth I would have liked to have spent a little more time there. The sun was still out. It was warm, and I had begun to worry that I would miss my target for getting the work done and the boat ready for the shed and painting by the end of the first week full in April.
 Sanding Down: Part Seventeen
31 March 2011
Gil and Gordon left on Thursday morning, so it was back to Imagination in the afternoon. I carried on working forward along the starboard side deck, which I had begun on Tuesday. It required working with the Detail Sander as I had learnt that if I tried to tackle such a small area with the "Pussycat" I would risk gouging chunks out cabin side.
I had to continue with the Detail Sander once I'd reached the foredeck. This is because its outer edges of the deck there start to rise forward of the cabin. As the edge rises an ever widening slope to the inner edge is created. On other boats you might call this a toe rail, but on the SeaHawk it has such a gentle slope it can't really be described as a "rail". At the point where the raised edge to the foredeck is level with the leading edge of the fore hatch it merges with a small raised deck area in the bows. However, even this small triangular area is not a simple level area, as in the extreme bow there is another curved slope in the deck and the final few inches of deck has a slight convex curve to it. The result is that virtually the whole of the fore deck is out of bounds to the "Pussycat".
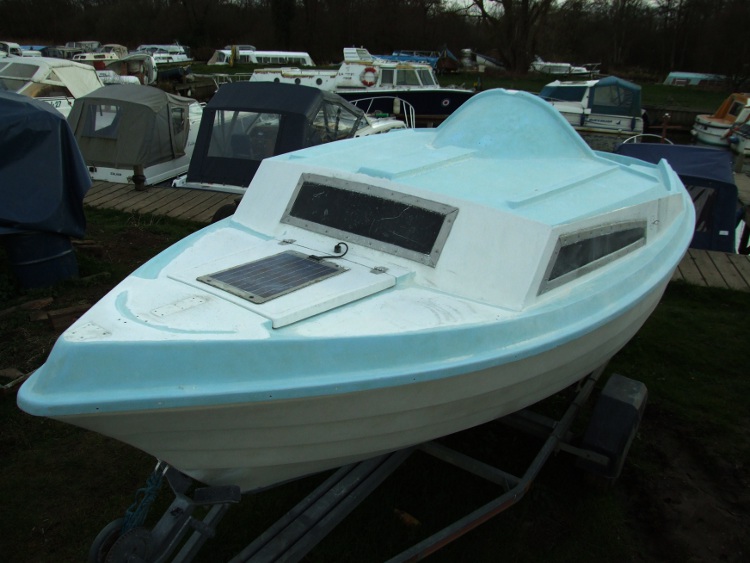
Sanding reaches the Foredeck
Having worked up the starboard side to the bows I worked round the shallow curve in the bows and back down the port side, doing the upstand normally hidden by the hatch along the way.
In the previous couple of sessions I completed the cabin roof. Observers might have thought good progress was made. Today's session may only have only rated in their eyes as modest progress. However, I was more than satisfied. WIth the aid of the "Pussycat", finishing the three relatively small triangular areas left should be fairly simple and quick. I should then be able to move on either to the cabin sides and front or the cockpit sole, the two final sections of the main hull to be completed.
